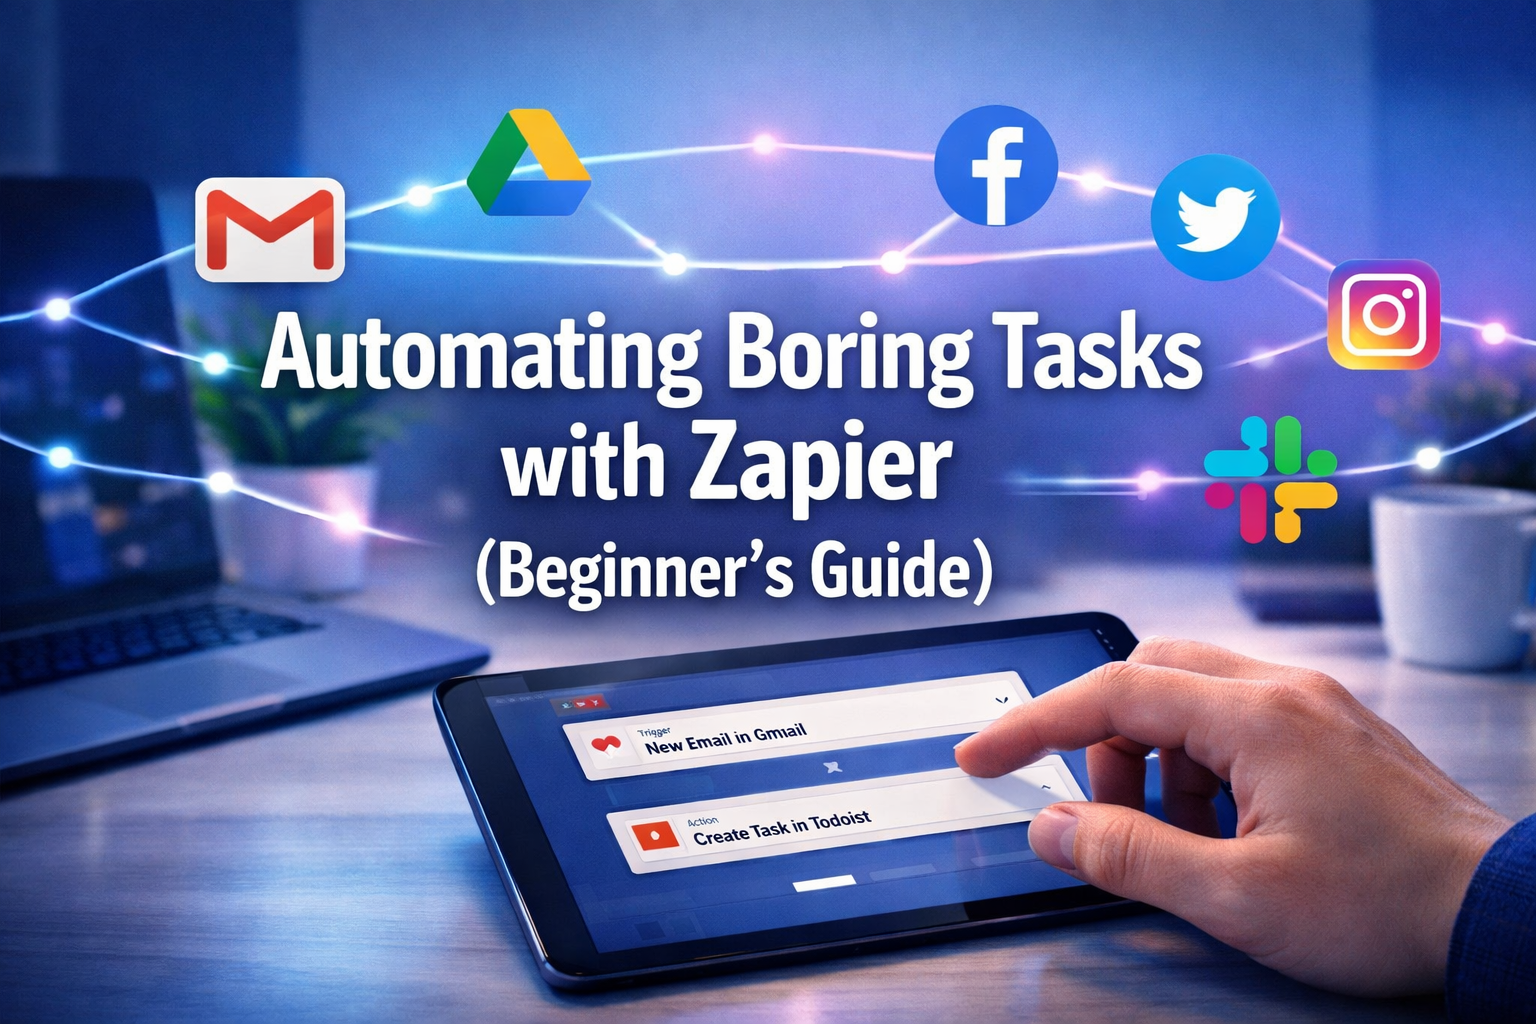

Are you tired of spending precious hours each day on repetitive, mundane tasks that drain your energy and steal your focus from more important work? Imagine a world where your digital tools talk to each other, automatically moving data, sending notifications, and executing processes without you lifting a finger. This isn't a futuristic dream; it's the reality offered by integration platforms like Zapier. This comprehensive beginner's guide on "Automating Boring Tasks with Zapier" will walk you through the fundamentals, empowering you to reclaim your time and boost your productivity starting today, in 2026.
Key Takeaways
- Zapier Connects Your Apps: Zapier acts as a digital bridge, allowing thousands of web applications to communicate and share information automatically.
- "Zaps" are Your Workflows: An automation built in Zapier is called a "Zap," consisting of a Trigger (what starts the automation) and one or more Actions (what happens next).
- Time-Saving for Everyone: From small business owners to individual professionals, Zapier can eliminate repetitive data entry, notification management, and content distribution tasks.
- Start Simple, Grow Big: Begin with straightforward automations and gradually build more complex workflows as you become comfortable with the platform.
- Unlock New Possibilities: Automating tedious tasks frees up time for strategic thinking, creative work, or even exploring new opportunities like scholarships for international students or career advancements.
Example 1: Save Gmail Attachments to Google Drive Automatically
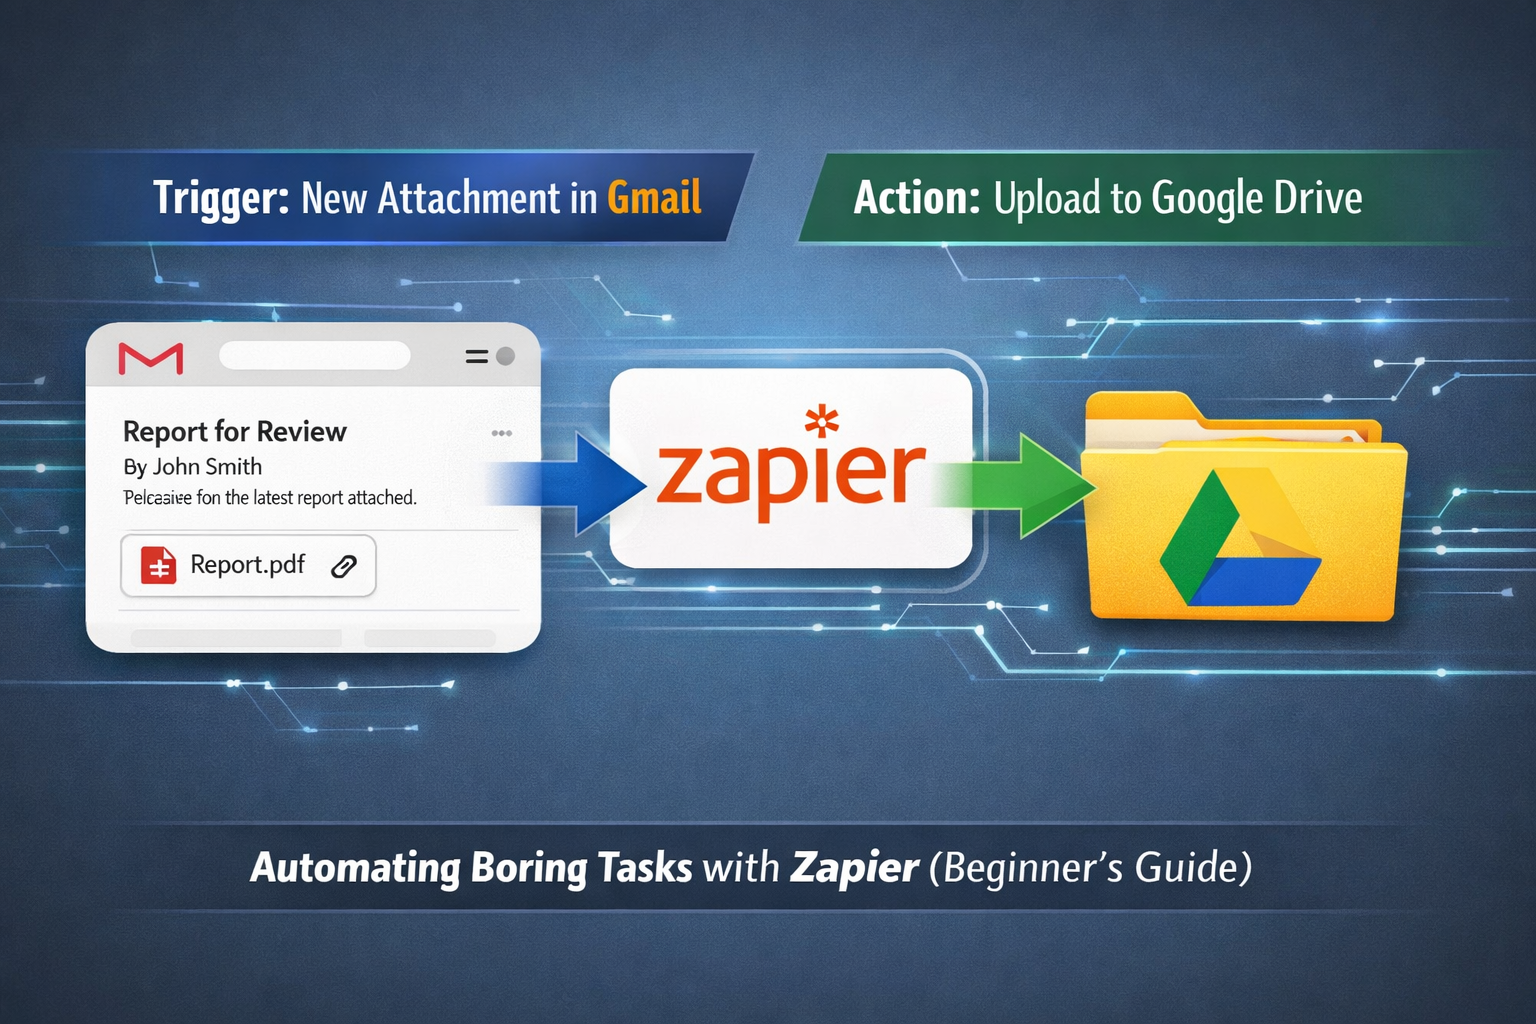
One of the most common and time-consuming "boring tasks" for many professionals is managing email attachments. Think about it:
- An important email arrives with a crucial document.
- You open the email.
- You download the attachment.
- You open Google Drive.
- You navigate to the correct folder.
- You upload the attachment.
- You rename the attachment (sometimes).
- You delete the original attachment from your downloads folder.
If you receive several such emails daily, these small steps quickly add up to significant wasted time. This is a perfect scenario for "Automating Boring Tasks with Zapier (Beginner's Guide)".
How to Set Up the Gmail to Google Drive Zap:
Let's break down how to create a Zap that automates saving new Gmail attachments directly to a specific folder in Google Drive.
Step-by-Step Guide:
- Sign Up or Log In to Zapier: First, you'll need a Zapier account. If you don't have one, head over to Zapier.com and sign up for free.
- Click "Create Zap": Once logged in, you'll see a prominent "Create Zap" button. This is your starting point for any new automation.
- Choose Your Trigger App (Gmail):
- In the "Choose App & Event" search bar, type "Gmail" and select it.
- For the "Trigger Event," select "New Attachment." This tells Zapier to start the automation whenever a new email with an attachment arrives in your Gmail inbox.
- Click "Continue."
- Connect Your Gmail Account: Zapier will prompt you to connect your Gmail account. Follow the on-screen instructions to grant Zapier the necessary permissions. This is a secure process.
- Set Up Trigger (Optional Filters):
- You can add filters here. For example, you might only want to save attachments from a specific sender, or emails with a certain subject line.
- For this beginner's guide, we'll keep it simple and save all new attachments.
- Click "Continue."
- Test Your Trigger: Zapier will retrieve a recent email with an attachment from your Gmail to ensure the connection is working and to provide sample data. This is crucial for configuring the next steps. Click "Test trigger."
- Choose Your Action App (Google Drive):
- Now, click on the "Action" step. Search for "Google Drive" and select it.
- For the "Action Event," choose "Upload File."
- Click "Continue."
- Connect Your Google Drive Account: Similar to Gmail, you'll need to connect your Google Drive account and grant permissions.
- Set Up Action (File Details): This is where you tell Zapier where and how to save the attachment.
- Drive: Select "My Google Drive" (or a shared drive if applicable).
- Folder: This is critical. Click on the dropdown and choose the specific folder where you want your attachments saved (e.g., "Email Attachments," "Invoices," etc.). If you don't have one, create it in Google Drive first.
- File: From the dropdown, select the "Attachment (Exists but not shown)" option from your Gmail trigger data. This tells Zapier to use the actual file from the email.
- File Name: You can customize this. A good practice is to combine elements from the email, like "Subject + Original File Name." For instance, choose "Subject" from the Gmail data, type a hyphen, then choose "Attachment Filename."
- Convert to Document: (Optional) If you want the file converted to a Google Docs/Sheets/Slides format, you can select that option.
- Click "Continue."
- Test Your Action: Zapier will now attempt to upload the sample attachment from your trigger test to your specified Google Drive folder. Check your Google Drive to confirm it worked!
- Publish Your Zap: If the test is successful, click "Publish Zap." Your automation is now live and will start working in the background!
"Automation is not about doing more things; it's about doing the right things, and doing them less often by leveraging smart tools." – Zapier CEO Wade Foster
This simple Zap alone can save you significant time over weeks and months, illustrating the power of Automating Boring Tasks with Zapier (Beginner's Guide). Moreover, by freeing up time, you might find yourself with more capacity to explore opportunities like fully funded PhD scholarships in Australia for 2026 or delve into other professional development pathways.
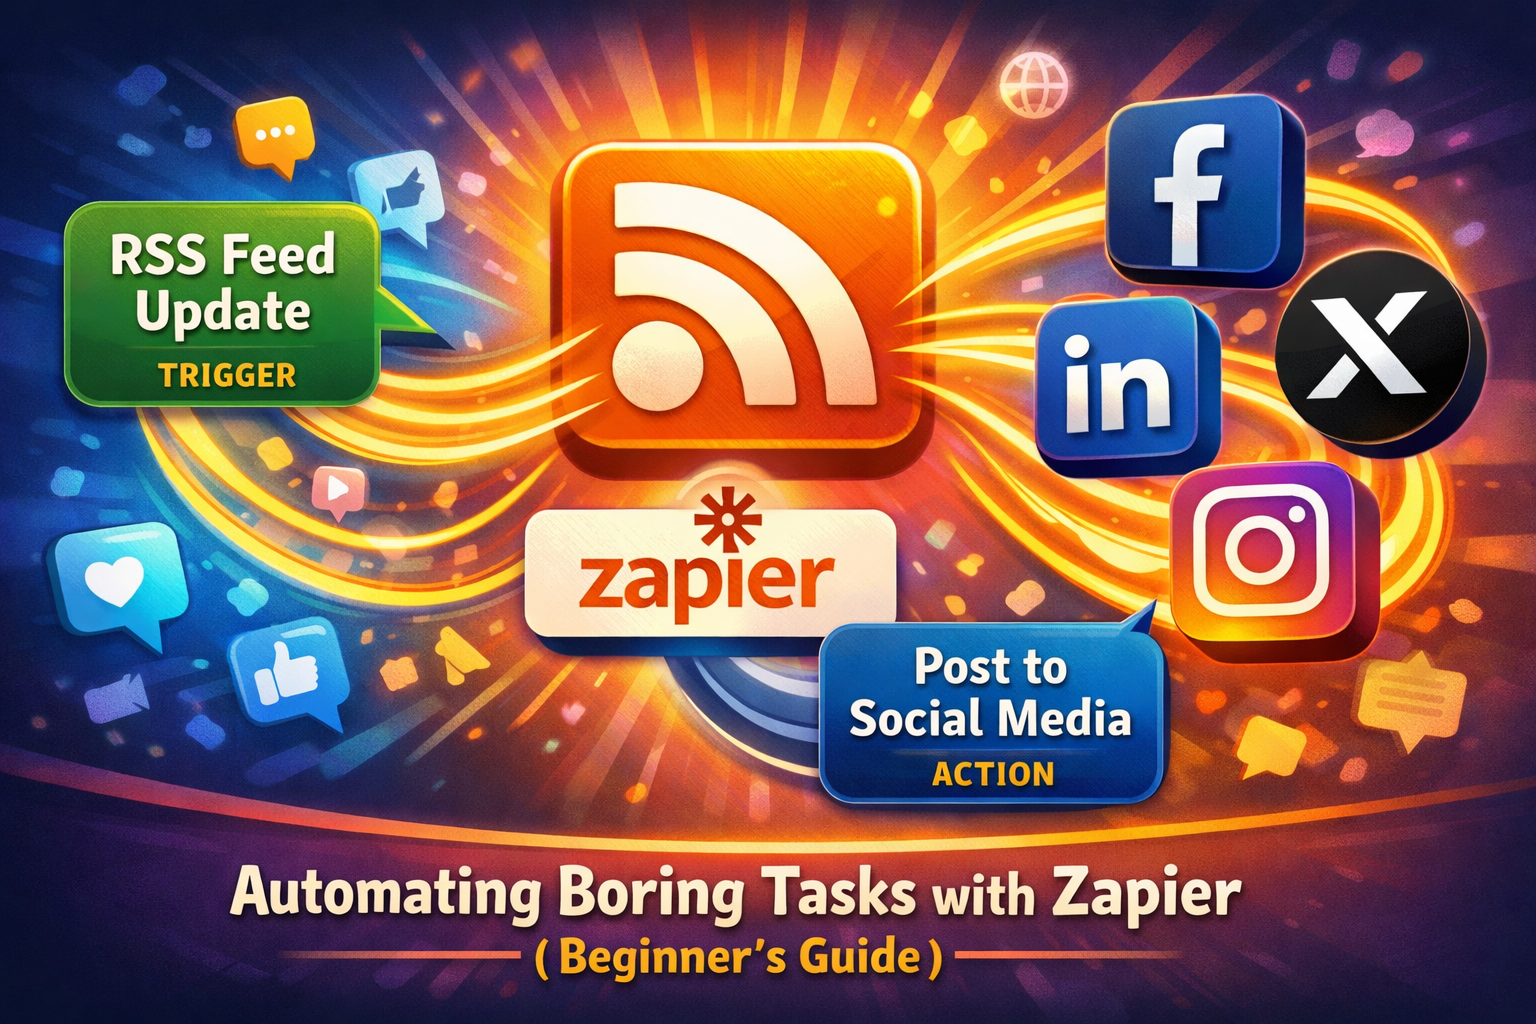
Example 2: Post to Social Media from RSS Feeds
Content creation and distribution are vital for businesses and personal brands in 2026. However, constantly remembering to share new blog posts, articles, or news updates across multiple social media platforms can be incredibly time-consuming and inconsistent. Imagine you've just published a new article on your blog, and instead of manually tweeting, posting to Facebook, and updating LinkedIn, it all happens automatically. This is another prime example of "Automating Boring Tasks with Zapier (Beginner's Guide)".
Why Automate Social Media Posting?
- Consistency: Ensure your audience always sees your latest content.
- Time-Saving: Eliminate manual posting from your daily routine.
- Reach: Distribute your content across all relevant platforms simultaneously.
- Focus: Free up mental bandwidth to create more quality content or engage with your audience.
How to Set Up the RSS to Social Media Zap:
This Zap will monitor an RSS feed (like your blog's feed) and automatically create posts on your chosen social media channels whenever new content is published.
Step-by-Step Guide:
- Start a New Zap: Log into Zapier and click "Create Zap."
- Choose Your Trigger App (RSS by Zapier):
- Search for "RSS by Zapier" and select it. This built-in Zapier app is perfect for monitoring feeds.
- For the "Trigger Event," select "New Item in Feed." This means the Zap will run whenever a new entry appears in the RSS feed.
- Click "Continue."
- Set Up Trigger (RSS Feed URL):
- In the "Feed URL" field, paste the RSS feed URL of your blog or the news source you want to monitor. Most blogs have an RSS feed, often found by adding
/feedor/rssto the end of the main domain (e.g.,yourblog.com/feed). - Click "Continue."
- In the "Feed URL" field, paste the RSS feed URL of your blog or the news source you want to monitor. Most blogs have an RSS feed, often found by adding
- Test Your Trigger: Zapier will fetch the latest item from your RSS feed. Review the data to ensure it's pulling the correct information (title, link, description). Click "Test trigger."
- Choose Your First Action App (e.g., X – formerly Twitter):
- Now, click on the "Action" step. Search for "X" (or Twitter) and select it.
- For the "Action Event," choose "Create Tweet."
- Click "Continue."
- Connect Your X Account: Connect your X account to Zapier.
- Set Up Action (Tweet Message):
- Message: This is where you compose your tweet. You can dynamically pull information from your RSS feed. A common format is:
[Title of New Item] - [Link to New Item] #YourHashtag. Select "Title" from the RSS data, type " – ", then select "Link." Add relevant hashtags like#Automation #BlogPost. - Click "Continue."
- Message: This is where you compose your tweet. You can dynamically pull information from your RSS feed. A common format is:
- Test Your Action: Zapier will attempt to create a sample tweet using the data from your RSS feed. Check your X account to see if the test tweet appeared.
- Add More Actions (e.g., Facebook, LinkedIn):
- You can add multiple actions to a single Zap. Click the "+" icon below your X action to add another step.
- Repeat steps 5-8 for Facebook Pages (using "Create Page Post") and LinkedIn (using "Create Share Update"). Customize the post message for each platform to fit its best practices. For instance, for a professional audience, you might want to share insights about job opportunities like caregiver jobs in Canada or welding jobs with visa sponsorship.
- Publish Your Zap: Once all your actions are set up and tested successfully, click "Publish Zap."
This Zap will now automatically share your new content across chosen social media platforms, drastically reducing manual effort and ensuring a consistent online presence. This showcases the incredible utility of Automating Boring Tasks with Zapier (Beginner's Guide) for content marketers and creators.
Understanding "Triggers" and "Actions"
At the heart of every Zapier automation lies a simple yet powerful concept: Triggers and Actions. Understanding these two components is fundamental to mastering "Automating Boring Tasks with Zapier (Beginner's Guide)".
Triggers: The Starting Gun 🏁
A Trigger is the event that starts your Zap. It's the "if this happens" part of your automation. Without a trigger, your Zap remains dormant, waiting for its cue.
Key Characteristics of Triggers:
- Always First: A Zap always begins with one and only one trigger.
- Event-Driven: Triggers are specific events that occur within an application.
- Always an App: A trigger is always tied to a specific app (e.g., Gmail, Google Sheets, Slack).
- Data Source: When a trigger fires, it often provides data that subsequent actions can use.
Examples of Triggers:
| App | Trigger Event | What it does |
|---|---|---|
| Gmail | New Attachment | Starts the Zap when a new email with an attachment is received. |
| Google Sheets | New Spreadsheet Row | Fires when a new row of data is added to a spreadsheet. |
| Typeform | New Entry | Initiates the Zap when someone submits a form. |
| Slack | New Message Posted to Channel | Starts when a new message appears in a specific Slack channel. |
| Trello | New Card | Fires when a new card is created on a Trello board. |
| Calendar | New Event | Triggers when a new event is added to your calendar. |
When considering a task for automation, the first question to ask is: "What event should start this process?"
Actions: The Chain Reaction 💥
An Action is the event that your Zap performs after the trigger occurs. It's the "then do this" part of your automation. A single Zap can have multiple actions, forming a sequence of automated steps.
Key Characteristics of Actions:
- Follows a Trigger: Actions only execute after a trigger has fired.
- Perform a Task: Actions are specific tasks performed within an application.
- Can Use Trigger Data: Actions can use information gathered by the trigger (or previous actions) to perform their task.
- Multiple Actions: You can string together many actions to create complex workflows.
Examples of Actions:
| App | Action Event | What it does |
|---|---|---|
| Google Drive | Upload File | Uploads a file to a specified folder in Google Drive. |
| Slack | Send Channel Message | Posts a message to a specific Slack channel. |
| Mailchimp | Add/Update Subscriber | Adds a new subscriber or updates an existing one in your list. |
| Asana | Create Task | Creates a new task in a specific Asana project. |
| Google Sheets | Create Spreadsheet Row | Adds a new row of data to a spreadsheet. |
| X | Create Tweet | Posts a tweet to your X (Twitter) account. |
The Power of "If This, Then That" (IFTTT)
Zapier essentially operates on an "If This, Then That" (IFTTT) logic.
- IF (Trigger) a new email with an attachment arrives in Gmail,
- THEN (Action) upload that attachment to Google Drive,
- AND THEN (Another Action) send a Slack message to your team notifying them of the new file.
This modular approach makes "Automating Boring Tasks with Zapier (Beginner's Guide)" incredibly flexible and powerful. You can combine thousands of apps in countless ways. For example, you could automate parts of your job search process, from finding care home jobs in the UK with sponsorship to managing applications for seasonal construction jobs in the USA.
Filters and Paths: Advanced Control
As you become more comfortable, Zapier offers advanced features like Filters and Paths to refine your Zaps:
- Filters: These allow you to set conditions that must be met for an action to run. For example, "only upload the attachment if the email subject contains 'Invoice'." This ensures your Zap only acts on relevant data.
- Paths: This feature enables you to create different action sequences based on specific conditions. For instance, "If the email is from Sender A, do X. If the email is from Sender B, do Y."
By understanding the interplay of triggers, actions, filters, and paths, you gain immense control over your digital workflows, truly embodying the spirit of Automating Boring Tasks with Zapier (Beginner's Guide).
Conclusion: If You Do It Twice a Day, Automate It.
In a world that constantly demands more of our time and attention, the ability to "Automating Boring Tasks with Zapier (Beginner's Guide)" is not just a convenience—it's a necessity. From managing email attachments to streamlining social media outreach, Zapier empowers individuals and businesses alike to take control of their workflows and focus on what truly matters.
The guiding principle for identifying tasks suitable for automation is simple: If you find yourself doing a repetitive task more than once a day, or even a few times a week, it's a prime candidate for automation. The time savings, reduction in errors, and boost in consistency will far outweigh the initial effort of setting up a Zap.
By leveraging Zapier, you're not just saving time on mundane tasks; you're investing in your productivity, your efficiency, and ultimately, your capacity for innovation and growth in 2026 and beyond. Imagine the doors that open when routine administrative burdens are lifted—perhaps more time for strategic planning, creative pursuits, or even exploring new horizons like studying in Germany for free or relocating to the UK with your family.
Actionable Next Steps:
- Identify Your Top 3 Boring Tasks: Take a moment right now to list the three most repetitive tasks you perform daily or weekly.
- Check for Zapier Integrations: Visit Zapier.com and search for the apps involved in your identified tasks. Chances are, Zapier supports them.
- Start Small: Pick the simplest of your identified tasks and try to build your first Zap, using this "Automating Boring Tasks with Zapier (Beginner's Guide)" as a reference.
- Experiment and Explore: Once you've mastered the basics, explore Zapier's extensive template library and look for new ways to connect your tools. The possibilities are virtually endless.
Embrace the power of automation and transform your workday. The future of productivity is here, and it's remarkably simple to implement with Zapier.
SEO Meta Title: Automate Boring Tasks with Zapier: A Beginner's Guide 2026
SEO Meta Description: Master Zapier in 2026! This beginner's guide helps you automate repetitive tasks, save time, and boost productivity with powerful app integrations.